Zoom Controls
One of CANVID’s standout features is Zooming, which lets you bring attention to specific parts of your screen recording. Whether you want to emphasize a button, highlight a section of code, or focus on key visual content, zooming helps direct your viewer’s eyes exactly where you want them.
What are Zooms?
In the Editor timeline, zooms appear as blue segments, placed just below the main video track (green bar). You can preview, move, adjust, and delete them anytime.

There are two ways to add zooms to your video:
Smart Zoom
These zooms are generated while recording. By default, the app automatically registers your mouse clicks and cursor movements as zooms.
Start a new recording
Run the app, and start a new screen/window recording.
Click while you record
While recording, move your cursor around the screen as you normally would, noting that each click will automatically be turned into a zoom in the Editor.
Stop Recording
When the recording is complete, the zoom segments will already be in place on the Editor timeline.
Custom Zoom
These are zooms that you can manually add to the Editor timeline after recording.
Go to the Editor
You can start a new recording or open an existing project.
Add a new zoom
In the timeline, hover over any empty space just below the video track (green bar). A blue square will appear to show where you can add a zoom. Left-click to place a zoom in your desired section.
Editing Zoom Segments
As long as your recording is in the Editor, zooms remain fully flexible and can be edited at any time. You can:
- Move them along the timeline
- Resize them using edge trim
- Add new zooms
- Delete or disable any zoom
Camera Zoom Behavior
In projects that include a webcam, the camera will shrink by default whenever a zoom is applied. You can change this behavior in Camera Editor > Camera During Zoom, where you can choose from three options:
- Do nothing
- Reduce Size
- Hide
Zoom Sidebar Options
Click a zoom in the timeline to open additional options in the left sidebar.
Zoom Mode
You can switch the Zoom mode between Auto and Manual.
- Auto: Zooms are set to Auto by default when added and will follow your cursor.
- Manual: Lets you choose exactly where to zoom. This opens the zoom map, allowing you to click on any area of the video to set the focus.
Zoom Level
Use the Zoom level slider to control how close the zoom appears on the screen
Additional Zoom Level Sidebar Options
- Set as Default: Set your current zoom level as the default for future zooms.
- Apply to All Zooms: Apply the current zoom level across all zooms in the timeline.
- Delete Zoom: Remove the selected zoom from the timeline.
Zoom Context Menu
Right-clicking on a zoom segment opens a context menu with more options:
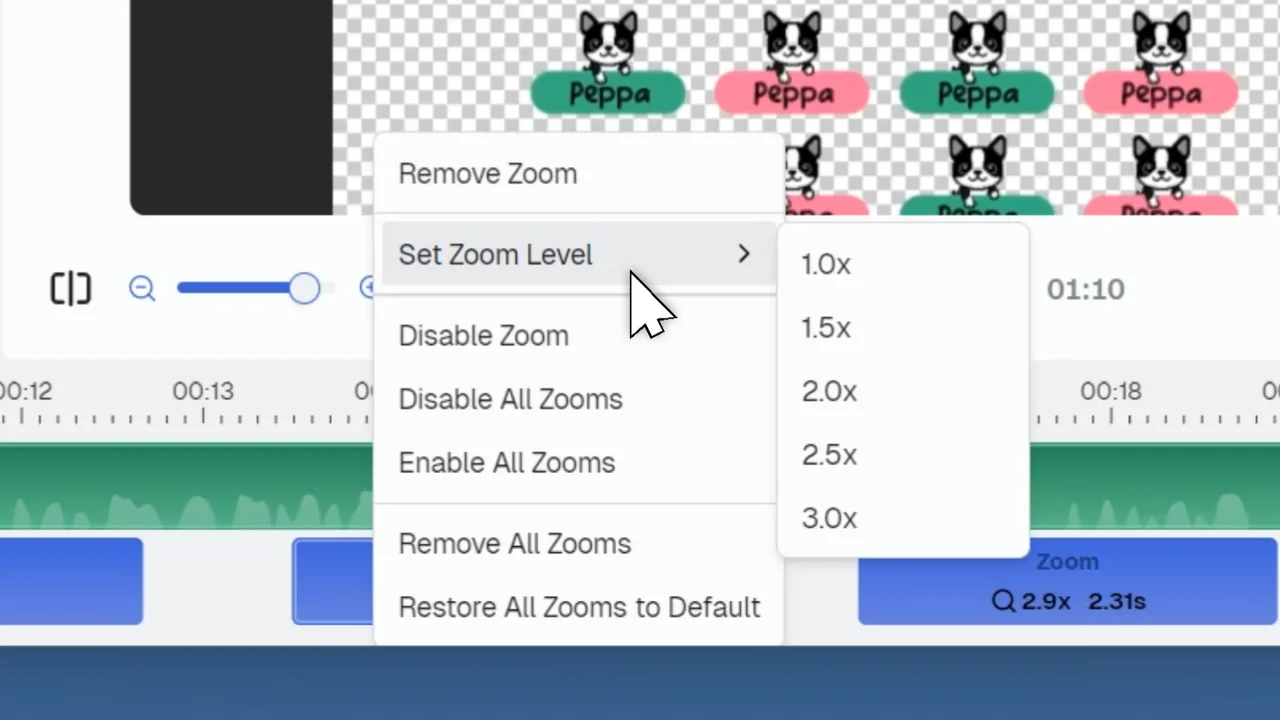
- Remove Zoom: Delete the selected zoom segment
- Set Zoom Level: Choose from preset zoom levels
- Disable Zoom: Temporarily turn off selected zoom
- Disable All Zooms: Temporarily turn of all zooms
- Enable All Zooms: Re-enable all zooms in the timeline.
- Remove All Zooms: Delete every zoom in the timeline
- Restore All Zooms to Default: Revert all zooms back to default values
Trimming Videos
Learn how to trim and cut parts of your video in CANVID using split, drag trimming, and Compress Cut to remove unwanted sections from your recordings.
Video Background Editor
Customize your CANVID screen recording background with wallpapers, gradients, solid colors, or your own images. Add blur, padding, rounded corners, and shadows for a polished, professional look.